When measuring a roof for shingles, start by calculating the area – length times width for a regular shape, breaking down into sections for irregular shapes. Account for the roof slope by adjusting area for accuracy. Avoid common mistakes like overlooking overhangs or valleys. Use the right tools, like a tape measure and safety gear, and factor in roof pitch. Accurate measurements save time and money on materials. Remember, precise measurements are essential, so you get the job done right the first time. More insights await on how to make sure your roofing project runs smoothly.
Understanding Roof Measurement Basics
When measuring a roof for shingles, it’s important to choose the right time and weather conditions for accuracy. Make sure to take safety precautions during the roof measurement process to avoid any accidents.
These points are vital to think about before starting any roofing project.
Choosing the Right Time and Weather Conditions for Measurement
To guarantee precise measurements, it’s crucial to take into account the optimal time and weather conditions for evaluating a roof’s dimensions. Here are some key factors to take into consideration:
- Daylight: Measure during daylight hours to make sure of proper visibility.
- Dry Weather: Avoid measuring when it’s wet or rainy to prevent slips and ensure accuracy.
- Mild Temperatures: Extreme heat or cold can impact materials, so measure on days with moderate temperatures.
- Minimal Wind: Wind can affect your tools and measurements, so choose a calm day for accurate results.
- Clear Skies: Cloudy weather may obscure details, so opt for clear skies for the best visibility.
Safety Precautions During Roof Measurement
Prioritize safety by implementing essential precautions during roof measurements to guarantee a secure and efficient process.
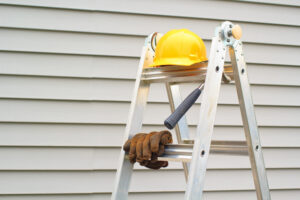
Before ascending the roof, make sure the ladder is stable, and secure, and extends at least three feet above the roofline. Wear appropriate footwear with good traction to prevent slipping. Utilize a safety harness and have a spotter present for added security. Be mindful of power lines and overhead obstacles.
Check the weather forecast and avoid measuring the roof during adverse conditions such as rain, snow, or strong winds. Keep your workspace clear of debris and tools to prevent tripping hazards.
Tools Needed for Roof Measurement
You’ll need specific tools to accurately measure your roof for shingles. Technology can provide precise measurements, ensuring you have the right amount of materials for the job.
Let’s explore how these tools can streamline the measurement process in roofing projects.
Using Technology for Precise Measurements
When measuring a roof for shingles, utilizing technology can provide precise measurements, ensuring accuracy in the project. Here are five essential tools that can help you achieve precise measurements:
- Laser Measuring Device: Offers accurate distance measurements.
- Roofing Software: Helps in creating detailed roof plans.
- Drone: Provides aerial views for better assessment.
- Smartphone Apps: Allow for quick and easy roof measurements.
- Digital Camera: Useful for capturing images to aid in measurements and planning.
Step-by-Step Guide to Roof Measurement
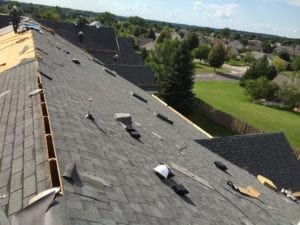
When measuring a roof for shingles, it’s crucial to take into account the different types of roof shapes you might encounter. Take into consideration the roof slope in your measurements to guarantee accuracy.
Begin by measuring the roof perimeter and eaves to establish a solid foundation for your project.
Measuring Different Types of Roof Shapes
To accurately measure different types of roof shapes, start by identifying the specific dimensions of each section of the roof. When measuring, consider the following:
- For a gable roof, measure the length and width of each side separately.
- In the case of a hip roof, measure the width and length of each section, including the ridge.
- Measure the base and height of a gambrel roof sections.
- Calculate the diameter of a dome roof for accurate measurements.
- For a skillion roof, measure the width and height of the slope for accurate shingle calculations.
Accounting for Roof Slope in Measurement
Account for the roof slope by factoring in the pitch when measuring for shingles. The roof’s slope affects the amount of shingles needed for the project. Steeper pitches require more material to cover the same area compared to flatter roofs.
To accurately calculate shingle requirements, determine the pitch of the roof. Use a pitch gauge or the ‘rise over run’ method to find the pitch angle. Once you have the pitch angle, consult a roofing chart to convert it into a pitch factor.
Multiply the area of each roof section by the pitch factor to adjust for the slope. This adjustment guarantees you purchase the correct amount of shingles for your roofing project.
Measuring Roof Perimeter and Eaves
Begin by measuring the roof perimeter and eaves to accurately assess the dimensions for your shingle installation project. To measure the roof perimeter and eaves effectively, follow these steps:
- Start at one corner of the roof and measure each side.
- Add all the measurements together to get the total perimeter.
- Measure the length of the eaves along the edges of the roof.
- Note any variations or irregularities in the eaves that may impact shingle installation.
- Double-check all measurements to guarantee accuracy before purchasing materials.
Calculating Roof Area for Shingles
When calculating roof area for shingles, estimating waste and additional materials is essential.
You should consider adding extra shingles to account for cutting, errors, and future repairs.
This calculation guarantees you have enough shingles to complete the job without delays or running out of materials.
Estimating Waste and Additional Materials
To accurately determine the amount of waste and additional materials needed, factor in the total roof area when calculating for shingles. Here are some essential points to take into account when estimating waste and additional materials for your roofing project:
- Include a waste factor: Account for approximately 10% additional materials to accommodate cutting errors and unexpected damages.
- Take into account starter shingles: You’ll need starter shingles for the edges of the roof to provide proper sealing and protection.
- Don’t forget about underlayment: Calculate the required amount of underlayment to guarantee proper water resistance.
- Factor in ridge cap shingles: Determine the necessary ridge cap shingles for the peak of the roof.
- Check for any additional materials: Depending on the roof’s complexity, you may need extra materials like adhesives, nails, or flashing.
Factors Affecting Shingle Measurement
When measuring a roof for shingles, consider how environmental factors can affect the accuracy of your measurements.
Factors like wind, temperature, and even sunlight can impact your shingle measurements, potentially leading to errors in estimation.
Being mindful of these influences will help you guarantee a more precise and reliable measurement for your roofing project.
Environmental Factors Impacting Measurement Accuracy
Environmental elements play a crucial role in the accuracy of shingle measurements for roofing projects. When measuring a roof for shingles, consider the impact of these factors:
- Weather Conditions: Changes in temperature and humidity can affect the size and shape of shingles.
- Sun Exposure: Direct sunlight can cause shingles to expand, leading to inaccurate measurements.
- Wind: Strong winds can displace shingles, making it challenging to measure them correctly.
- Rain: Wet shingles can appear larger, potentially skewing measurements.
- Seasonal Variations: Different seasons can cause materials to contract or expand, impacting measurement accuracy.
Being mindful of these environmental influences can help ensure precise measurements for your roofing project.
Common Mistakes to Avoid
When measuring your roof for shingles, be sure to review your accuracy to avoid common mistakes.
Double-check your measurements and calculations to make sure they’re correct.
Taking the time to verify your numbers can save you time and money in the long run.
Reviewing Measurement Accuracy
To guarantee precise measurements when measuring a roof for shingles, it’s imperative to avoid common mistakes that can impact the overall project’s success. Here are some common mistakes to avoid:
- Not accounting for overhangs: Neglecting the overhangs in your measurements can lead to insufficient materials.
- Ignoring roof pitch: Disregarding the roof pitch can result in inaccurate measurements and waste of materials.
- Miscounting valleys and ridges: Each valley and ridge requires special attention; overlooking them can cause material shortages.
- Neglecting to factor in waste: Forgetting to include waste calculations may leave you short on materials when you need them most.
- Relying solely on digital tools: While useful, digital tools can have inaccuracies; always double-check measurements manually for precision.